2009/12/26

High Resolution Lunar Mosaic

I did a quick imaging work in Christmas Eve because I needed to rush home for dinner. The seeing was 5/10 and the transparency was 4/10. Originally I want to shoot both Jupiter and moon. However I didn’t make it for the Jupiter. I used the Equinox 120ED and the 5X Powermate for the Jupiter imaging. The effective focal length was 4500mm. It was just too difficult for me to get the image on the DBK21 CCD. I tried for an hour and finally I gave up and switched fast to the moon. It was a good exercise for me to shoot the moon in high magnification. I used the Equinox 120ED and 2.5X Powermate. The effective focal length was 2250mm. It was longer than the focal length of C8. In order to save my work, I intentionally used more margins. I don’t want to ruin the whole image by miss a small parts of the moon. The final mosaic is a composition of 22 photos. I found it was difficult to make the sharpness uniform in all 22 photos. The underlining key is the selection of alignment points, not the number of alignment points and the wavelet. After process the image for more than 15 hours, I gave up! This is the result.
Click here for full size images:
Moon age 7.9, Equinox 120ED, EQ3Pro, DMK41, Registax 5, PS CS4

Filled background and rotation applied


2009/12/19

My Dark Age

Despite the recent cloudy weather in Hong Kong, the weather seems going to be good in the Christmas holiday. I wish clear skies are waiting for me! However, I was totally down today! I went to the Lion Rock Mountain today with the Hiking Club members. Apart from the foggy weather, it was cold and dry. It was good for hiking! However it was my fate too! When we walked for an hour, I needed to check the map to make sure that we were in the right trail. As I needed to find the map from my backpack, I asked one of my students to hold my camera for me. While I was reading the map, he suddenly dropped my camera! Good grief! My D80 and 18-200mm VR were gone! I guessed the D80 would be totally lost! I am not sure about the 18-200mm VR. It needs optical alignment for sure. Anyway, I need to bring them to Nikon and see if they can be recovered. They are now in Intensive Critical Unit, ICU! I told my student that this accident can be fixed by money. I will pay for my beloved camera and lens. But some accidents in physics lab would not be fixed by money, perhaps fatal or irreversible! One must be very careful in handling equipment. Anyway, this is not the end of the story. When we almost finished the hike, I wristed my two ankles 拗柴! It was the first time I hurt both ankles simultaneously! In fact I haven’t seen any people hurt their two angles at the same time! Poor me! I wish I can recover quickly. Otherwise it will ruin my Christmas holiday completely! No stargazing!!!
My two ankles were wristed!

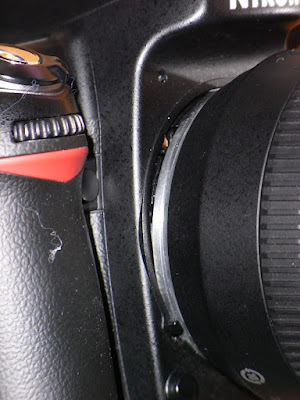
My D80 was seriously damaged! See the gap between the lens and the body. This part is supposed to be very tough! But cracked now!!!

These are the bits and pieces from the inner part of D80 and battery compartment. In fact some parts are missing!

2009/11/30

Reprocess the 28-11-2009 Lunar Mosaic

The previous lunar mosaic was not very good. Some parts of the moon were blurred. A quick reprocess of one of the avi file tells me that the problem arises from post processing. The problem was mainly due to the poor selection of the alignment points. After some experiments, I found that the optimal number of alignment points is 4 to 5. The location of the alignment points is also important. I cannot generalize the general rules, but it seems that both high and low contrast locations are important. If you want to reveal the details of the low contrast location, one needs to pick an appropriate location for it. So don’t just focus on those high contrast locations.
Moon age 10.636, Equinox 120ED, EQ3Pro, DMK41, Registax 5, PS CS4

2009/11/28

Lunar Mosaic

Last night the sky condition was good. Both seeing and transparency were about 6/10. I went to the roof of my school and did observation and imaging. Since I needed to go to a wedding banquet, I did everything in a rush! I deliberately used the Equinox 120ED to make a high resolution lunar mosaic. The image was makeup of 4 images. This was the first time I made it! My next challenge is to use a 2.5X Powermate to make a lunar mosaic!
Moon age 10.636, Equinox 120ED, EQ3Pro, DMK41, Registax 5, PS CS4

2009/11/25

The Lunar X

Yesterday after school, I was fed up with my work and I missed two consecutive observation days already. I don’t want to end up with sorrow and I don’t want to waste the clear sky. So setup telescopes quick and enjoy!

This was the first time I seriously use the new eyepieces, Baader Planetarium 8-24mm zoom, Tele Vue Nagler 3-6mm zoom and Tele Vue 2-4mm zoom. However, the instrument is nothing more important than the observation. I started the observation at about 6:00pm. The moon & Jupiter were hanging in the sky. When I pointed the M8 ACF to the moon, I quickly recognized the Lunar X. This is the first time I saw it and I remember that it can be seen in certain moon phase. However, I must good home because my two little daughters were waiting for me. So I packed all the telescopes and went home. I thought I can take the Lunar X after dinner.

After the diner and father’s evening duties, I started to image the moon at about 10:00pm. Oh Gosh! The Lunar X was not as obvious as that at 6:00pm (Moon age 7.615). It was stand out at 6:00pm, but now it was pale. I did everything in rush. Finally I made it! After that I search the Lunar X information in the Internet. The Lunar X can only be seen in 4 hours just before the quarter!
http://www.astropix.com/HTML/SHOW_DIG/097.HTM
Lucky me! I made it! My next challenges are high resolution lunar mosaic and high power magnification lunar features.
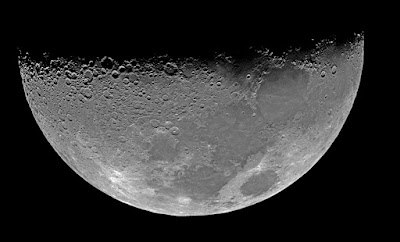
Moon age 7.781, Equinox 80ED, DMK 41, Porta mount, 482 out of 500 frames stacked, Registax 5, PS CS4


2009/11/20

Equinox 66 Vs Tak FS60C

A long awaited comparison, Sky-watcher Equinox 66ED Vs Takahashi FS60C. I borrowed the Equinox 66ED from the dealer for sometimes and waited for my friend, David, for quite a long time. The sky was not cooperating. Our schedules were not matching. Finally I gave up the comparison through celestial objects, but terrestrial observation.

I went to David’s school at about 5:00pm yesterday. We setup all the scopes quickly. David’s students were good helpers and little judges. I guess they are trained to be experienced telescope users. The main disc was Equinox 66ED Vs Tak FS60C. However, there was another super star TMB 80/480. The main concern was the chromatic aberration. We selected some white light sources from distant buildings. In addition, we luckily found some really small bright spots which can be treated as point source. So we did “star test” as well. However, one should be reminded that these artificial objects were much brighter than Sirius and even Venus. Using these artificial sources was extremely harsh to telescopes.
At the first sign, both scopes are strongly built. I like both focusers, although Tak FS60C got no dual speed, it is firm and solid. While the Equinox’s dual speed focuser makes focusing easier. We used the Nagler 2-4mm zoom and Nagler 3-6mm zoom. Ordinary diagonals used were used. For comparison purpose we set the magnifications of Equinox and Tak to 400/3 = 133X and 360/3 = 120X respectively. Despite low contrast, both scopes didn’t breakdown even at 2mm eyepiece focal length. The trends of CA of both scopes were similar. There were some violet in front of the focus and some green behind the focus. However the degree of CA was different. The CA of Tak FS60C was very small. The CA of Equinox was small. Both scopes gave good “star test” results. All the diffraction rings were symmetrical. However the pattern in front of the focus and behind the focus in the case of Tak FS60C was a bit better. We repeated all the comparisons by swapping the Nagler 2-4mm zoom and Nagler 3-6mm zoom, the results were the same, which means the differences were not from the eyepieces, but the scopes. Anyway, the difference in CA was not big in fact. So what really make the difference in this comparison? Resolution!!! David and I found that the resolution tells the difference. Tak FS60C gave shaper images.
About the CA of Equinox 120ED, it was reported in Cloudy Nights that if one stops down an Equinox 120ED to 110mm, it was virtually color free. So I tested this idea in Equinox 66ED. Since I could not find a compass this morning, I used a cap to draw a circle. The diameter of the stopper was then 58.5mm. There was still CA exists and showed a bit improvement in violet. I couldn’t see improvement in green.
Well, the final verdict cannot be made. The reason is that in real sky observations, stars are much dimmer that artificial lights. The observed CA in very bright artificial lights may not be detectable by human eyes in the case of real stars, so further test is needed.
At the end we try those eyepieces on the legendary TMB 80/480 quickly. We selected a very bright source. No kidding! We were not able to find any CA!!! We were rushed by janitor. So we didn’t try deeply the Nalger zooms on the TMB 80/480. Wait for next chance!


2009/11/10

DIY Bi-scope Platform

Being inspired by the China made telescope mount, I designed my own DIY Bi-scope Platform. My dad is a mechanic and crafted this platform according to my design and specification. The parts included are: Aluminum plate, Vixen Porta mount, Vixen dovetail saddle, Sky-watcher dovetail. The Bi-scope can carry two telescopes and some accessories. The weight of the platform is 3.4 kg. In this trial, I mounted an M8 (5.6 kg) and an Equinox 120ED (6.8 kg) on to the Bi-scope platform (3.4). The whole setting was mounted on HEQ5Pro. No kidding! The total loading is 5.6 + 3.4 + 6.8 = 15.8 kg!!! I believe this reached or beyond the limit of HEQ5Pro. This combination of Porta and dovetail saddle allows the fine tuning of two scopes such that they can be pointed to the same direction. There are some holes drilled on the platform which allow the flexibility to mount a camera. Anyway, it is not likely to mount two big telescopes on HEQ5Pro in field. Perhaps one big and one small telescope would be manageable. You know I am not strongly build and my car is small. Anyway, I feel very happy with this Bi-scope Platform. Thanks Dad!

Parts: Aluminum plate, Vixen Porta mount, Vixen dovetail saddle, Sky-watcher dovetail


Bi-scope Platform

Weight of Bi-scope Platform

Weight of Equinox 120ED


Weight of Meade 8" ACF SCT

15.8 kg on Sky-watcher HEQ5Pro


Holes for camera


A Quick Observation

This evening the sky was clear, there was no cloud at all. I quickly setup the M8 and EQ3Pro at the school roof. This was the second time I used the M8 and last time was in a rush too. The sky condition was the second best I encountered in the school. The seeing was about 6/10 to 7/10. The Polaris was easily seen this time. I spotted about 10 stars in the sky. I spent about an hour on observing the Jupiter. It was not a serious comparison the M8 and Equinox 120ED. Although the M8’s image is brighter than that of 120ED, the color of M8 is pale compared with Equinox 120ED. I used the Sky-watcher 8-24mm zoom eyepiece. All the images were sharp with some deterioration towards the 24mm limit. I boosted the magnification to 2000/5 = 400X. Obviously the image was okay. Some color fringes could be seen however the contrast was bad. Once I boosted the Equinox 120ED to 800/15X5 = 450. Although not much detail could be seen, the contrast was bad. This means M8 and Equinox 120ED got similar resolution, but Equinox got better color and contrast. This conclusion might not be accurate. A side by side comparison would be more reliable. I will do it shortly.

2009/10/27

Lunar Image Taken with Equinox 66ED

Home observation again! Apart from the clouds running around, the seeing tonight was quite good. This lunar photo was taken by a small refractor Equinox 66ED and DMK41. Without much stacking skill, the result is follow:

Equinox 66ED, DMK41, best 442 frames stacked


Equinox 66ED, DMK41, 500 frames stacked

2009/10/26

Equipment Testing: Equinox 66ED

Following the testing of Equinox 66ED for terrestrial observation a few days ago, last night I carried out another testing for observing the moon and Jupiter. Here is my scoring scale:
6. Excellent
5. Very Good
4. Good
3. Average
2. Bad
1. Rubbish
This is just an impression marking and subject to be changed according to my experience in astronomy. Let me make it clear. I’ve seen the APM APOs. Those are prestigious refractors. The images are razor sharp and ultrahigh contrast. I rank it 6, excellent. This means for similar image quality, I will rank it 6. This scale will be changed if I find something better than APM APOs. This is a casual visual test. Ordinary diagonal and Sky-watcher eyepieces and Tele Vue Powermates were used. The observation site was my home. As this is a small telescope, it is no point to use it for deep sky objects visually. Use it for bright celestial objects are more sensible, say moon and planets, right? That’s why I tested it at home. Both seeing and transparency were modest. As mentioned in my previous test that for terrestrial observation, the image quality was very good if the magnification is below 80X. Once it goes beyond 80X, the contrast and brightness becomes very low and the color tone is bad. So it wouldn’t be promising to use this small refractor for terrestrial observation or birding for over 80X. Otherwise it is a small, but powerful weapon. The story is different for planetary observations. This is what I guessed in my previous test:
“However, if it is used for stargazing, the magnification can be boosted further since the background is much darker. It all depends on what celestial objects you are going to watch.”
I found that for both lunar and Jupiter observation, the magnification can be boosted up to 200X, perhaps 220X! At such magnifications, the images still not breakdown and one can still see some details. Here were the results:
Lunar Observation:
Below 133X, all the images were very good. The chromatic aberration was extremely small.
400/15x5 = 133X (Good)
400/5x2.5=200X (Average)
400/2 = 200X (Average, this setting is a little bit better than that of 400/5x2.5 = 200X in terms of details and contrast)
400/9x5 = 220X (Average)
400/8x5 = 250X (Bad, the contrast is too low and not much detail can be seen)
400/5x5 = 400X (Rubbish, completely breakdown)
Jupiter Observation:
400/8 = 50X (Excellent, high contrast image can be seen, the color fringes of Jupiter were clear, 4 pin sharp Galileo satellites can be seen)
400/6 = 67X (Very good)
400/15x2.5 = 67X (Very good)
400/5 = 80X (Very good)
400/15x5 = 133X (Average)
400/2 = 200X (between average and bad, the Jupiter’s fringes still here, this setting is a little bit better than that of 400/5x2.5 = 200X in terms of details and contrast)
400/5x2.5 = 200X (between average and bad, the Jupiter’s fringes still here)
400/9x5 = 222X (Bad)
As an epilogue, I didn’t expect something good can be seen for a China made small 66mm refractor for 133 X or beyond. Now I was amazingly seen the moon’s craters and Jupiter’s fringes at 200X with this small China refractor. I was satisfied. So! What next? I really want to compare Equinox with Takahashi FS60C and Tele Vue TV60. Everyone says Takahashi is excellent, Tele Vue is fabulous! Later I will compare the Equinox 60ED and Takahashi FS60C, as I got a friend who owned an FS60C. But no luck for TV60! TV60 was claimed by Tele Vue and echoed by owners that it can be boosted up to 180X. This puzzled me now! What it means by 180X? Is there any contrast, color or sharpness deterioration? If the answer is no, the TV 60 can certainly go beyond 200X with some tolerance. This means TV 60 can go beyond 83X per inch. I cannot answer this… Anyway, wait for the battle between FS60C and Equinox 66ED.
Home Stargazing!


Sky-Watcher Equinox 66ED

Goodbye Orion Meteoroid Shower

Last Friday, 23/10/2009, I went to PTC and see if I could catch the last chance to see the Orion Meteoroid Shower. The peak was in 21/10/2009, but the sky was not cooperating until last Friday! When I arrived at PTC, there was only one stargazer around. Finally I saw two shooting stars and my wife saw one only! How lucky! Anyway, the seeing was ok. I enjoyed the sky for 2 hours. My wife and I saw the Orion nebula, M42. Anyway, good luck for the coming Leo meteoroid shower.

In Search of Good Observation Sites

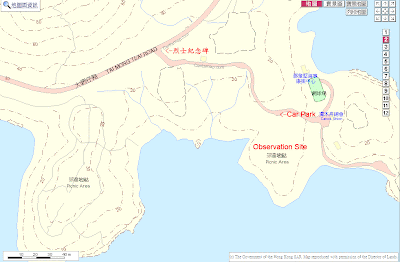
The light pollution in Hong Kong is terrible. A good observation site is hard to find. The location should be as dark as possible, private car can be easily accessed, convenient to set telescopes next to the car, covered by mobile phone network, safe etc. The well known observation site is Pak Tam Chung’s coach park. It is reasonably dark and convenient. However, the light from the nearby public toilet is very annoying. In addition, it is also a rendezvous of midnight motor cyclists. Shui Hau & East Dam are very dark, but they too remote. From time to time, I look around when I am driving in order to find new observation sites. Recently I spotted a new site which is close to PTC, 烈士紀念碑, in Sai Kung. See the attached maps. The field of view is wider than PTC. There are two minor light pollution sources. Light pollution from southeast, Sai Kung, and from AMS Canoe Centre, northeast. The big plus of this site is that the field of view is much better than PTC. In addition, there is a nearby toilet, BBQ stoves and tables.


2009/10/19

Equipment Testing: Meade 8 ACF, APM/TMB 80/600 & Equinox 66ED

The past few days were in real rush! Setting S4, S5 and S7 Physics test papers were exhausting. I don’t know what was going on. Everything seemed came out at once. So many things tempted me to go away from my school duties! The sky condition seemed fairly good, replacing equipment, chance of getting new telescope, chance of trying different telescopes, chance of getting a used top class telescope etc. Finally I squeezed some time for hobby!
The long waited Meade 8” SCT AFC was finally settled! The order has been delayed for many times and I’ve disappointingly waited for half years. Finally I got an offer from a local stargazer who bought this telescope in a special offer given by the local dealer half years ago. The reason that he sold this M8 was that he got another extremely cheap LX200 offer. The M8 ACF he sold to me was very new. It has been used in field, Pak Tam Chung, for once only. I was lucky enough to get it because another stargazer told me about this and I responded fast enough to it, or the chance would go! It is very hard to get a used M8 ACF in Hong Kong. Although he sold me at the same price he paid half years ago, it was still a good price and it healed my pain at once! Last night, the sky condition was so so. The transparency was ok, but the seeing was bad. With clouds running around, I could hardly catch a few moments to look at Jupiter. Nothing could be concluded, but the M8 worked. The maximum magnification I tried was 2000/9 = 222X.
Another encounter was the trial of the APM/TMB 80/600 APO. I went to the Sky-watcher dealer and replaced the long tripod with a short tripod for the EQ3Pro. Sky-watcher is certainly a homely-made like manufacturer. Their product specifications change from time to time and even their dealer doesn’t know it! Their product specifications can be modified according to requests! This is odd, but flexible right! I am an efficient guy. I know the dealer got a used APM/TBM 80/600. It would be nice if I can have a look at it before it was sold to somebody else. I deliberately arranged the tripod replacement and the glance of the APM/TBM APO in one go. Ha Ha! In fact the main course was the APO… Well, it was daytime, I did the terrestrial observations only. The first eyepiece I tried on the APM/TMB 80/600 was 25mm Aspheric Orthoscopic. When you look through the eyepiece, the feeling was WOW! The image was so sharp and the contrast was so high. The image was sharp to the edge of the field. This telescope was the best I’ve ever seen for terrestrial observation! I cannot imagine what will happen if I use the APM/TBM 203 to do terrestrial observations! The color tone was warm. The Aspheric Orthoscopic gave good eye relief and the field was reasonably wide. The viewing was so pleasing and comfortable. When I put the 16mm TBM Super Monocentric, which is supposed to be a top planetary eyepiece, the off-axis image was a bit blur. However, the image around the principal axis was extremely sharp and of very high contrast. The color of the Mono was not as warm as Orthoscopic. I didn’t have the chance to compare these two eyepieces on viewing stars side by side that day. I couldn’t comment which one was better for stargazing. It would be nice to do it later. Finally I tried the 13mm Ethos. There is no need to mention about its field of view. The viewing was very comfortable. The image was sharp and the contrast was high. I couldn’t tell the difference in sharpness between Aspheric Orthoscopic and Ethos. Both are very good eyepieces, which need longer observation and being tested to differentiate. Again I was in a rush to go! So try again next time.
I borrowed the Equinox 66ED from the dealer for a short period of time. I tried it in daytime recently. A first look at this little scope, it inherited the beauty build of Equinox series. I have tried Equinox 80ED and 120ED, now the 66ED. The only Equinox I didn’t try is the 100ED. Well, the optic of this scope was good. I used Skywatcher eyepieces and Tele Vue 2.5X and 5X Powermates in the entire testing. For daytime terrestrial observation, if the magnification was below or equal to 400/5 = 80, the color, sharpness and contrast are very good. It doesn’t mean it will breakdown when the magnification goes beyond 80, but will not be too promising to use it for birding or other terrestrial observations as the contrast and the brightness are low. I tried to boost the magnification to 400/8*2.5 = 125X and 400/15*5 = 133X respectively. I was able to see the price tag of a fruit store. I guess the characters’ size was about 5cm and the store was about 1.5km apart. A quick estimated resolution to achieve such an observation is 5X10^-2/1.5X10^3 = 3.3X10^-5. The Rayleigh resolution, theoretical maximum, is 1.2X550X10^-9/66X10^-3 = 1.0X10^-5. It is not bad right! However, if it is used for stargazing, the magnification can be boosted further since the background is much darker. It all depends on what celestial objects you are going to watch. For the 200X, I tried in different settings, 400/2 = 200X and 400/5X2.5 = 200X. The 400/2 = 200X gave a slightly better performance in terms of sharpness and contrast. At such magnification, the contrast was very low. However, the image didn’t breakdown completely. One could still see some details. The corresponding magnification per inch is above 70X. It is a good figure already. I owned a small achromatic refractor, Meade ETX 80. Its optical performance cannot be compared with Equinox 66ED in terms of chromatic aberration and resolution. To be fair, the price of ETX70 was just a few hundred. Although optically it is a loser, it is a best buy.

2009/09/26

Top equipment, but hazy sky!

Last night I was in Tai Po. The main task was APO testing. The dealer imported a few APM/TMB APOs. It was a rare chance that one could have a side by side comparison of 100mm/F800mm, 130mm/F1200mm and 203mm/F1420mm APOs. The 203mm/F1420mm was owned by the dealer. The other two APOs were goods. However, it was ruined by the bad sky condition! The sky was very hazy. The seeing was very bad. The moon was covered by a yellowish Arabian mask. It would be nice if you are not stargazer. When I back home, I browsed around the Internet. It seemed that all local observation sites, like Pak Tam Chung, were disappointing. I got ready the equipment in my boot in the afternoon. It would be meaningful to know how good those APM APOs compared with Equinox. Finally I decided not to setup my equipment and just tried those APOs.
At a first glance, the tube material was robust lightweight polymer. Both 100mm/F800mm and 130mm/F1200mm can be mounted on EQ3Pro. I forgot to carry both APOs and got a feeling of how heavy they were, but they should not belong to heavy class. Everything was strongly and nicely built. The base and the bracket of the finder scope were quite unique. I would not say it is stylish, but the design concept was neither Japanese nor Chinese, but German. The Feather Touch focuser was solid. Well back to the main dish, optical performance. Both APOs delivered high contrast images. I tried another 12” Newtonian last night. The Newtonian deliver brighter images, but it contrast was far below than that of APOs at similar magnifications. We boosted the magnifications to 288X and ~500X for 100mm/F800mm and 130mm/F1200mm respectively. These mean we pushed the limit to 72X/inch (288X) and 96X/inch (500X) respectively. The 100mm/F800mm was able to handle 72X/inch. Although the Jupiter image was breakdown under 96X/inch for the 130mm/F1200mm, one could still see some color fringes of Jupiter. That was not a flat images disc of Jupiter.
Last night there were two points I especially want to mention, the chromatic aberration and the resolution of the surfaces the Jupiter’s satellites. When I used the APOs to observe the Jupiter, the north pole of the Jupiter was a bit bluish. The dealer said it was due to atmospheric chromatic aberration, not the chromatic aberration of the APO. Here comes the question! Is the dealer telling the truth? To me, this is a physics question. If the optics got no or low astigmatism, the chromatic aberration should be cylindrical symmetric. There should be false color around the star, not just appearance in certain direction. My conclusion is that the bluish color at the north pole of Jupiter was caused by atmospheric aberration. One can do some experiments to verify this. Use the same telescope to observe the same object and see if the position of the aberration changes with time. About the resolution of the surface of the Jupiter’s satellites, moon surface, we saw all four satellites, IO, Europa, Callisto and Ganymede. The dealer and I were not sure about the moon surfaces were revealed or they were just Airy discs. As the magnitude of those satellites were small, probably larger than 5. When I observed the satellites by the 100mm/F800mm APO, it seemed that I saw the 1st order diffraction ring, but I was not sure. But it was possible that it was Airy disc. When we used the 130mm/F1200mm APO, the image of the satellite improved a bit. The hazy sky kept on discourages us whole night. It seemed that the 130mm/F1200mm APO gave a more solid image. However, it was illusion or fact. We need to wait for the sky. But it is highly possible that these two APOs will be delivered to new owners. So what can I do! Ha! Ha! Use theory to justify it! As these two APOs were claimed to be diffraction limited, we can do some calculations and see if it is possible to see the moon surface.
The visual angles in arc second of the satellites are:
IO 1.2”
Europa 1”
Callisto 1.6”
Ganymede 1.7”
By using the Rayleigh Criteria, we can calculate the theoretical limit of the resolution of the telescope.
R = 1.2 L/D where R is the resolution, L is the wavelength and D is the diameter.
The resolution calculated is in radian, we can convert it back to degree easily. In order to get a feeling of how good is the optics, I assume the average wavelength of visible light to be 550nm. After some simple calculations, for diffraction limited optics, the resolution of different diameter in arc second is given below:
100mm 1.36”
130mm 1.05”
203mm 0.67”
It means that 100mm APO is not able to resolve the Jupiter’s moon surface. The image was just an Airy disc. The 130mm APO can barely resolve the Jupiter’s moon surface. The 203mm APO can resolve Jupiter’s moon surface. This is a simple discussion, meaning that if the optics is diffraction limited, it is possible to resolve it. On the other hands, the practical optic is not possible to go beyond the theoretical limit.
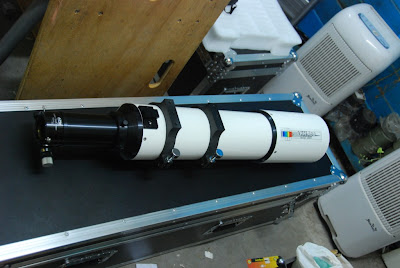

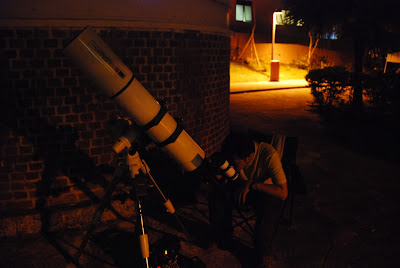
APM 100mm/F800mm


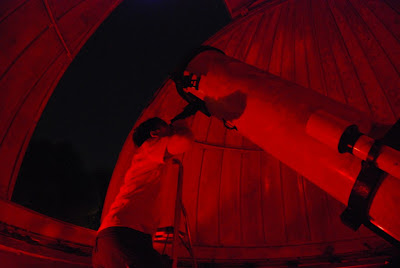
APM 130mm/F1200mm


Newtonian 305mm/F8.5

2009/09/23

Equinox 120ED and DBK21
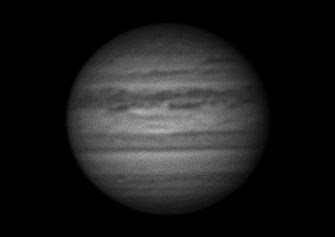
Last Friday,18th September 2009, I got a chance to use the Equinox 120ED and Imaging Source DBK21 and DMK41 in the field. The sky condition was exceptionally good. I went to Pak Tam Chung at about 10:00pm after monitoring my daughter’s homework. Since I got lot of outstanding tasks, time was limited for me. I planned to image the Jupiter and one to two deep sky objects, but I end up with the Jupiter only. The main reason was that I was inexperience in handling the Imaging Source camera. I’ve learnt the basic of how to image Jupiter from David, but lack practice. This was the first time I use the DBK to image Jupiter. I knew some crucial parameter in imaging the Jupiter. However mirror setting could ruin the photo! It takes time to learn and art cannot be rushed!
When I arrived PTC, I started the setting at once. I was kind of slow and inexperience in setting up the equipments. Since this telescope was a rare species in PTC, It attracted some stargazers. Finally when the setting was done, we viewed Jupiter. Everyone was amazed by the 120ED. Mirror God used his, prestigious telescope tester, Takahashi 3.6mm eyepiece, to test the Equinox 120ED. Here was his exact wording:
"Hmm... 幾好幾好!真係唔錯!雖然唔係一級的鏡,只是色差差少少!好少!只係輸比Astrophysics少少!想不到兩枚玉都有咁好performance!"
This was not the end of the story. When I finished the setup of DBK 21, the movie shocked everyone. It was because I was green in setting the DBK, everyone knew it when they saw my clumsy acts, but the movie was quite sharp already before stacking. It was good because the seeing & transparency were good. These unleashed the power of Equinox' optics and the power of DBK's electronics. My comment is that Equinox 120ED delivers high contrast, high color saturation and high resolution images in its own class. The color was a bit warm and yellowish in viewing Jupiter. The price is good. No complain for such performance price ratio, $13800 for a 120ED! If one wants to take serious photos, a Feather Touch focuser is needed, perhaps a high quality reducer. I am still very busy on school’s work and no time to learn how to stack the photos. The photo below is just a default click-click-click output of Registax 5.0. I will process it seriously later.

Jupiter, Equinox 120ED, TV 5X, DBK 21

2009/09/05

The Delighting Jupiter and Moon 賞心「月木」

Starting from mid August, I was busy preparing the commencement of the academic year. Although I had a few stargazing activities, I didn’t have time to record what I have done. I did visual observation for the Jupiter opposition. I tried my friend’s Obsession 18” UC. I placed the telescope order for my school etc. I was lucky enough to have the full support from my principal that I can buy enough equipment to start astronomy in school. We bought a Sky-Watcher Equinox 120mm ED Refractor, a Sky-Watcher Dobsonian 12” Collapsible, Sky-Watcher EQ3Pro equatorial mount, Binoculars, The Imaging Source DBK 21 and DMK 41 etc. All the equipment enables me to start stargazing activities, promoting science education and enriching the NSS Physics teaching in Astronomy and Space Science.

Last night was the first stargazing activity this academic year. I made an elegant Chinese name for this activity, 賞心「月木」Delighting Jupiter and Moon. I used the Stellarium to find out the appropriate time to hold this activity. It was because my school was surrounded by a public housing estate and a hill. The field of view from the school roof is very narrow. Without careful planning, the observation would definitely be doomed! Originally I planned during the observation time, the Jupiter and the moon would appear between the gap of two buildings, finally I changed the observation site from the school’s roof to a nearby roundabout. I guessed students would be happier with an unobstructed view.

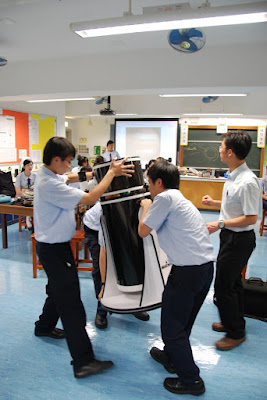
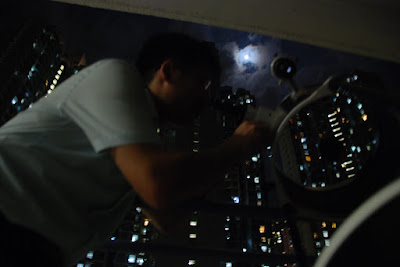
After a short introduction about the Jupiter and the Moon, we went to a nearby roundabout. The transportation was easy as we had about 20 students. However, the setting was quite exhausting! The temperature was high and I needed to setup three telescopes. Finally I gave up and ended up with two refractors. You know I need to control and discipline about 20 students in the street and at the same time I needed to setup the equipment, it was really something! A few of my students were good. They asked if they could help. But I did not have enough time to train them about the setting. I dare not to let them do it! I don’t want to risk the expensive equipment. Well! I will train them afterward. Anyway, I finished the setting in wet! When I finished setting up the first telescope, Equinox 80ED, everyone was amazed by the Moon. This was the first time they saw maria and craters. The second wave came after the setting up of second refractor. The target was Jupiter. Everyone was shocked by the Jupiter and its 4 moons, Io, Europe, Ganymede and Callisto! This was the first time in their life that they had such a close contact with Jupiter! I was the prime master of climax! I deliberately increased the magnifications gradually. Every time when I boosted up the magnification, changed to a shorter focal length eyepiece, everyone was so amazed and excited! The only defect of the activity was that students needed to wait for a long time! The queue was quite long! When it was about 9:30pm, a few students reported me that there were a few drops of rain! I was scared and packed all the telescopes at once. When we backed school, there was no rain at all! What a false alarm! Some students were not very happy because they didn’t have a chance to look at the Jupiter! I promised them to organize anther activity shortly and they will have the first priority to join!
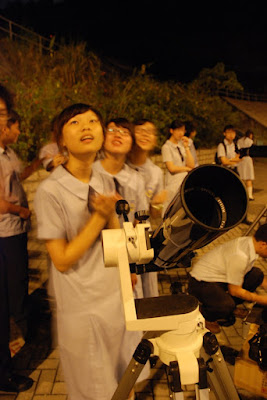


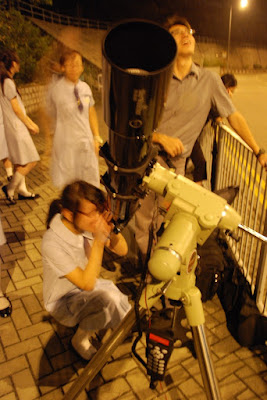
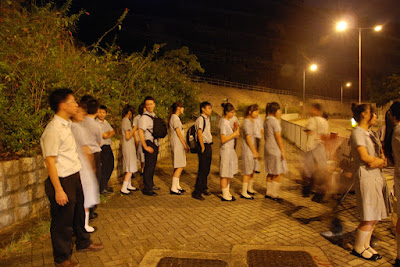


After dismissing the students, I stated in the school and did some more observations with another Physics teacher in the school. We used the Sky-Watcher 12” Dobsonian and Equinox 120ED. Due to the light pollution, we only observed the Moon and Jupiter. Both seeing and transparency were modest. The magnification was about 200-300X. We were not able to explore the limit of these two telescopes. However, the primarily visual ability was good. A further test is needed.


2009/08/15

Laser Hazard

As a physics teacher, I clearly understand the potential danger in using laser. The power of ordinary laser pointers is large enough to hurt eyes in a few seconds if direct laser beam is shone on the eyes. The damage is Irreversible! The green laser pointers used in stargazing are much more powerful than that of ordinary laser pointers. Usually the power of a green laser is larger than 10mW. The power of ordinary laser pointer is usually less than 1mW. One can imagine what will happen if green laser beam is directly shone on eyes! Even the scattered light may hurt your eyes. It is a good practice to turn on the green laser at a level higher than the eye level. In addition, I am used to standing behind the one who are using the laser. Last night I encountered a very dangerous situation. As usual I stand behind the one who are using the green laser. He was shining the laser beam to the eyepiece and the laser beam came out from the objective. Ah.. This was a new method to test the direction of the telescope. While I was watching at the back of him, the scatter laser beam shone on my eyes! Gosh! Since the field was very dark. I went to the toilet and see if any problem with my eyes! God bless! Yeah! There was no blind spot visually! I guess most eyepiece cases are black in color. This lowered the intensity of the scattered laser beam. If not, the result would be disastrous! Well! After this bad experience, I have concluded the followings precautions:
1. Make sure no people in the direction of fire.
2. Shorten the fire time when you fire the laser.
3. Don’t wear shiny watches or decorations on your hands when you operate lasers.
4. Don’t look at the area around the laser pointer, even it is not directed at you.
5. Stand sideway to the one who is operating the laser.

Equipment Review

Back to spring of this year, I started my interest in astronomy. I bought my very first binoculars from Grand Eye, read books and surfed the Internet. Astronomy has become my hobby. I don’t know how long I will stay with this hobby. Apart from my major, physics, in the past I got several hobbies, computer, music, philosophy, Chinese literature, English literature, aquarium, psychology etc. Once I get into the hobby, I will push myself to learn it. My character is that I will get myself to a certain level in a specific field. Now astronomy is my craze! After a while, perhaps several years, I will stop. However, I will pick up again after leaving it for some time. Different books can be found in my bookshelf. I bought several telescopes in the past few months, 10x50 binoculars, 10x42 binoculars, unbranded 5” refractor, NexStar 4SE, Equinox 80ED, C5, LS35THaDx. The NexStar 4SE OTA was sold because of the perchance of C5. I think C5 is the upper limit of a grab-and-go scope for me. Now the C5 become my most favorable scope because of the delayed arrival of Meade 8” ACF SCT. My recent interest is planetary imaging. Without a long focal length telescope, I cannot go too far. In term of optics, I like Equinox 80ED. It is high contrast, good color tone and good resolution. The dead knot of 80ED is that, its focal length is too short for planetary imaging. However, I am sure that it will become my favorable weapon in deep sky imaging. It takes time for me to be ready for deep sky objects which involve in skills and equipment. We have fewer numbers of solar planets than the number of deep sky objects. Deep sky objects are gorgeous, huge, mysterious and unreachable! After waiting for more than a week, finally a ridge of high pressure started to form. The sky condition last night was fair, but just could not wait for any longer. I went back after a wedding banquet! When I arrived at PTC, it was 11:30pm already. Due to limited time, I tried the newly bought Tele Vue 5X Powermate and did a visual test. I told Bingsze to bring his Meade 5X TeleXtender so that we can do a fair test on both barlows (Powermate is in fact exactly a bawlow optically). The local dealer of Meade did this test before, but it is not convincing. The test result and photos posted by him were unexpected. From his photos, Meade beat Tele Vue! As Tele Vue is the icon of top quality in the field, people suspected the result.
However, there is no follow-up from different parties. My curiosity drove me to find out the answer. I did a preliminary visual test last night. The telescope used was an unbranded 110ED and the eyepiece was Sky-Watcher 5mm eyepiece. The target object was Jupiter. There were totally 4 stargazers involved in the test including myself. In terms of visual observation, we cannot reach the same conclusion. One of a well known stargazer, Mirror God, said that the two 5X barlows were very close. However Meade 5X TeleXtender got a bit more chromatic aberration. He added that it would be better to use Newtonian to perform the test, as it is chromatic aberration free. In terms of cost performance ratio, Meade wins. Bingsze said the performances were very close and Tele Vue got a bit better in chromatic abberation. Lewis said both barlows got very similar in revealing details, but Meade got a bit better chromatic aberration. My conclusion is that the performances were very close visually. Powermate reveals a bit more details and the contrast is a bit higher. Since the performances of the two barlows are very close, we need to perform another photographic test next time. However, we all think that as the differences were hard to tell and we did not come to the same conclusion. The Meade 5X TeleXtender should be the best buy because it just costs about 60% of Tele Vue 5X Powermate. However this test was not comprehensive. It is desirable to use a Newtonian to perform the visual and photographic test.

Tele Vue 2.5X and 5X Powermates


Last night I also tested the unbranded 127mm refractor which I bought from Boss Kwan. It has been sitting in the store room for a few months. Every time I got a chance to go stargazing, I used to test the more expensive equipments I owned. They are Equinox 80ED, C5 and NextSTar 4 SE. It is a prejudice! I found that this unbranded 5” refractor was good in the sense that the resolution is reasonably high and the image was bright. The weak point was obviously the chromatic aberration. The chromatic aberration of this 5” refractor is considerably better than my other achromatic refractor, ETX 70. Purple edge was shown when it was focused before the focus. Green edge was shown when it was focused beyond the focus. When it was in focus, there were a bit greenish edges. The view of Jupiter was bright, sharp and showed good details. After viewing this unbranded 5” refractor, I must say it is my excellent choice! It is simply unbeatable! No complaint for just $1680!

Unbranded 127mm F750m Refractor

2009/08/02

Sidewalk Astronomy and Telescopes Watching

Last night neither transparency nor seeing was good. However, it was a year of International Astronomy’s monthly activity, sidewalk astronomy. The activity was held in Tin Shui Wai, which is far away from Tseung Kwan O. I was happy to join the activity because my wife decided to go with me. When we arrived virtually all the telescopes were pointing to the moon. This was the brightest object that could amaze the general public. The most interesting thing for me to join this activity was I can have a chance to try different telescopes. The biggest telescopes are always eye-catching, the TMB 8” APO and the Takahashi M-250. Just an impression, the TMB 8” APO gives better contrast. I couldn’t tell the different between sharpness because they were using different eyepieces and the magnifications were different. Anyway the Ethos eyepiece was impressive in terms of view angle. I just wonder my eye’s view of view is too small compared with Ethos FOV! It just gave you a feeling of cruising around the moon. One cannot describe the FOV of an airplane’s window! Well all these, 8” APO, 10” Takahashi and Ethos, are expensive. I deliberately look at some down to earth telescopes. Believe it or not, Sky-Watcher 5” Maksutov-Cassegrain was really good. The image of the moon was crispy and the contrast was high. I remembered once there was a used one in the forum a few months ago. The owner asked for $1700 if I remembered correctly. Hmm…. I missed a chance.


TMB 8" APO


Takahashi M-250


After I walked around for a while in Tin Shui Wai, I decided to go to have my own star gazing. I rang my friend Lewis and our destination was Lung Ha Wan. We arrived at Lung Ha Wan at about 10:30pm. But the favorable location was occupied by some midnight divers! Gee! We wanted to try a new location, but it was just being occupied by others! Anyway, Lewis and I looked around and see if it was a good location for star gazing. But sky was very hazy and we could only see the Vega, the Jupiter and the moon. As there were no favorable car parks, we decided to go to good old Pak Tam Chung.
When we arrived Pak Tam Chung, there were no star gazers! I was fooled by those posts in the forum. Maybe everyone went to Tin Shui Wai. Well! We two lonely twins stated to setup our scopes and practice. The sky condition became very bad. When we arrived we could see the blurred moon, the fading Vega, the dim Polaris and Perhaps the bright Jupiter. I tried to setup the HEQ5Pro as quickly as possible. At the point I wanted to do the polar alignment, the Polaris was gone! So I used the compass to solve it. Unexpectedly the alignment done was quite good. The tracking of Jupiter was good. We shot the Jupiter with different imaging device, D90, 450D, SPC900NC and LPI. Both D90 and 450D have life-view which was very useful in focusing. But all the photos taken by D90 were unsatisfactory! We don’t know clearly why D90 failed. Maybe it was because of the flip mirror of D90 in the life-view mode flips before the release of the shutter, while 450D not. The small vibrations of flipping the mirror caused the burred images. As a Nikon user, I need to figure it out! This needs another investigation. My second task was to align the NexStar 4SE mount. It just couldn’t track the sun probably during the recent solar eclipse. I believe that ex-owner didn’t get it alignment in 2-star alignment or 3-star alignment once. According to the manual, one needs to get NexStar alignment once with at least 2-star alignment once before it works properly. However the noxious clouds covered the sky. You know! Finally I gave up and went to have dessert in Sai Kung. Today I tried to process my photos. I still don’t know how to use Registax. The photos shown were just click-click-click product.
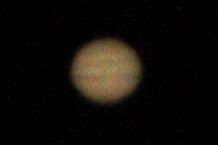


Jupiter: C5, TV 2.5X, ISO 1600, 1/25, 450D
Jupiter: C5, TV 2.5X, ISO 1600, 1/25, D90

Jupiter: C5, SPC900NC, 1200 frames, Registax
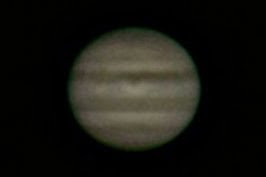
Jupiter: C5, TV 2.5X, SPC900NC, 1200 frames, Registax

2009/07/23

Solar Eclipse Photos Processing

After taking a rest and having summer class, I can process the solar eclipse photos took yesterday. I want to make something special rather than post a lot of photos in my blog. Finally I made two photos. One is a close-up and the other one is a wide-angle. I used the photos taken by using C5, Thousand Oaks type 2+ filter, D90 and HEQ5Pro, to make the solar eclipse close-up photo. I used the photos taken by using 18-200mm VR, Baader solar film and D80, to make the solar eclipse wide-angle photo. I like the orange image produced by the Thousand Oaks type 2+ filter. It gives me a moody and warm feeling. On the other hand, the Baader solar film gives white images. It gives me cool and harsh feeling. Anyway, from the photos, one can see that some photos are interfered by clouds. The bloody clouds ruined the last few minutes of the eclipse! Life is like this! Never mind! Just enjoy the process and happily wait for the next solar eclipse.
I like this one the best. Sometimes clouds decorate the eclipse!
When I process the photos, I find I can do it better next time. First of all, I used the programmable shutter to shoot the photos. However, the time interval was two minutes and one minute when the eclipse was close to maximum. This strategy was not so flexible when I process the photos. At the end of the day, one needs to select constant time interval photos in order to give a dynamic feel of the eclipse. As you don’t want the photos to overlap each others, so the desired time interval would be three to four minutes. However if you do this, the noxious clouds or other unexpected event happened, say an airplane fly by, you are forced to miss one slap-shot! So if you set the time interval to one minute, then you can have better options to select from. In addition, if you have a chance to observe the total eclipse, it is better to use the full power of your camera. The corona is easily missing!